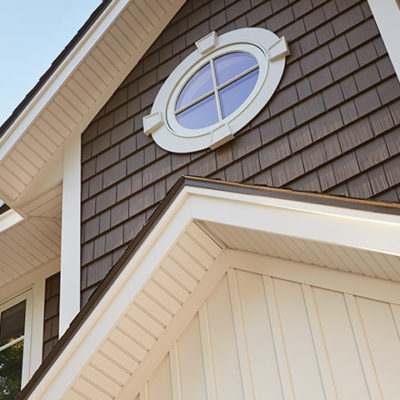
Placing Shaker Siding At Top Of Peak

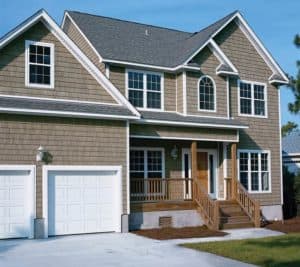
Scalloped Siding Craftsman Bungalow Exterior House Siding House Exterior

Craftsman Style Gable Decoration Google Search Cottage Exterior House Trim Roof Design

Scalloped Siding For Peak Farmhouse Style Exterior House Siding Carport Makeover

Cedar Siding Seattle Cedar Fencing Washington Cedar Homes House Exterior Cedar Siding

Staggered Cedar Shingles Cedar Shingle Siding Cedar Shingles Cedar Shingle Roof

Pacific Blue Shake Siding With Stone House Paint Exterior Exterior Paint Colors For House House Exterior

Replace siding by working from the bottom up you might need a helper here.
Placing shaker siding at top of peak.

Pictures And Photos Of Vinyl Siding For Your Home Or House House Exterior House Siding Exterior House Colors

White Corners Shaker Siding In Peak House Front House Exterior Shaker Siding

Craneboard 6rye Craneboard 6 Clay Portsmouth Shake Cedar Shake White Trim Windows House Exterior House Siding House Designs Exterior
Cedar Discovery Ply Gem

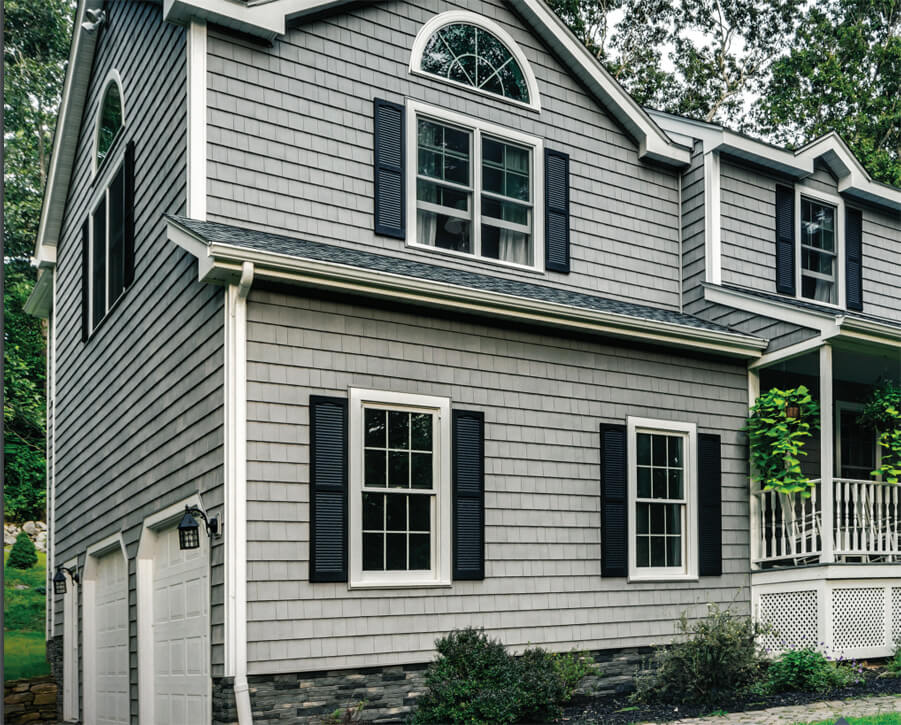
Kaycan Vinyl Siding Shakes In Smoke With White Trims And Grey Stone Beige Neutral Organic Nature E Vinyl Siding Vinyl Siding Manufacturers Siding Colors

All About Fiber Cement Siding Cottage Exterior House Architecture Styles Facade House

Vinyl Shake Siding On A Gable Vinyl Shake Siding Cottage Exterior Siding Options

Royal Ironstone Dark Grey Siding And Dark Grey Shakes Decorative Gable Accents White Trim Certainteed Morie Grey Siding House Ranch House Exterior Grey Siding

Peak Of Roof With Ridge Vent And Asphalt Shingles Nailed Over Vent Material Ridge Vent Asphalt Roof Shingles Asphalt Roof

Details Combination Of Shakes And Board And Batten Siding With White Trim Metal Roof Exterior House Colors House Exterior Exterior Siding

Batten Board On Bottom Cedar Shakes Hardy Shakes On Top More Batten Cottage Exterior Exterior House Siding Exterior Siding Options

Cedar Gable Bracket Details Are Truly Craftsman Style At Its Best Craftsman Style Homes Craftsman House House Exterior

Image Result For Cedar Shake Roof Backdrop Cedar Roof Cedar Shake Roof Cedar Shingle Roof
Vinyl Shake Siding 5 Best Alternatives To Real Wood Siding Cost Calculator

Jodi S Renovation Project Dormers Cedar Lap Siding Shingle Siding

How To Replace Cedar Shingles Siding Repair Cedar Shingles Cedar Shingle Siding

Pin By Linen And Petals On A Home Exterior Siding Options Exterior House Siding Vinyl Siding House

Mahogany Decking Copper Gutters Connecticut Roofing Shingle Siding Cedar Shingle Siding Architectural Shingles
1

Cedar Shake Siding Cost In 2020 Pros Cons Of Cedar Siding

Pin By Aaron J Rock On Shouse Mountain Home Exterior House Paint Exterior Red Brick House

Soffit Recessed Lighting Outdoor Recessed Lighting Recessed Lighting Exterior Lighting
Tando Vinyl Shake Shingle

Blue Bayou Napco Siding Https Www Pinterest Com Sierrahomesofmi House Siding Vinyl Siding House House Paint Exterior
Source : pinterest.com
